


Transform Your Outdoor Space: Stunning Flush Mount Ceiling Lights You Can't Resist!
As the sun sets and the evening air cools, the ambiance of your outdoor space can transform dramatically with the right lighting. Outdoor flush mount ceiling lights have surged in popularity as homeowners strive to create inviting environments that extend their living areas into the great outdoors. These fixtures not only illuminate patios and porches but also add a splash of style and sophistication. The right lighting can enhance the architectural features of your home while providing essential functionality for gatherings and relaxing evenings outside. Imagine a summer night spent with friends, laughter echoing under beautifully designed lighting—this is the effect of incorporating outdoor flush mount ceiling lights into your space.
Understanding Outdoor Flush Mount Ceiling Lights
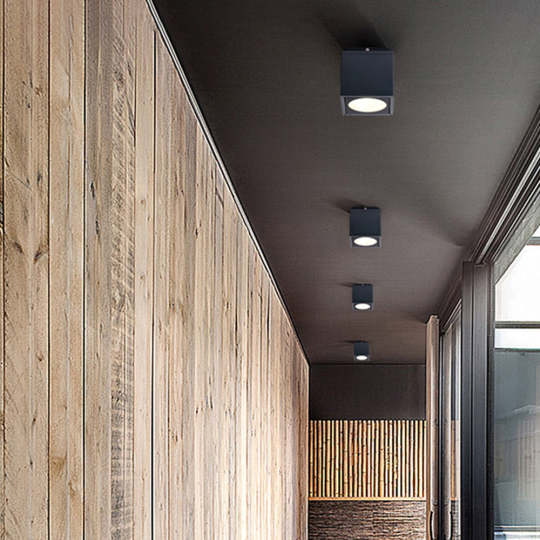
Outdoor flush mount ceiling lights are fixtures designed to be mounted directly against the ceiling, providing a sleek and streamlined look for your outdoor areas. Unlike pendant lights, which hang down, flush mounts are installed close to the ceiling, making them ideal for spaces with low overhead clearance. They come in various designs, from modern and minimalist to rustic and traditional, ensuring that there is a style to suit every homeowner's taste. One major advantage of using flush mount fixtures is their ability to distribute light evenly across a wider area, creating a warm and welcoming atmosphere while also enhancing safety by eliminating dark corners. Additionally, many flush mount lights are designed to withstand outdoor elements, making them a durable choice for continuous use.
Design Ideas for Outdoor Spaces
When integrating flush mount ceiling lights into your outdoor spaces, consider the various settings where they can shine. For patios, a cluster of flush mounts can create a stunning focal point, especially when paired with outdoor furniture that complements the lighting's style. Think about using fixtures with natural materials like wood or wrought iron to enhance a rustic theme, or opt for sleek metal finishes for a more contemporary look. In porches, flush mounts can create a cozy nook, perfect for evening reading or sipping coffee. Selecting colors that resonate with your home's exterior—like soft whites or earthy tones—can help the lights blend seamlessly into your outdoor decor. For gazebos, a statement flush mount can act as a conversation starter, drawing the eye and creating an inviting atmosphere for gatherings. You might even consider installing dimmable flush mounts, allowing you to adjust the lighting for different occasions, from lively parties to intimate dinners.
Installation Tips for Flush Mount Ceiling Lights
Installing outdoor flush mount ceiling lights can be a rewarding project, but it’s important to prioritize safety and follow proper procedures. Begin by gathering necessary tools such as a screwdriver, wire stripper, electrical tape, and a voltage tester. Before installation, ensure you turn off the power at the circuit breaker to prevent any accidents. Start by marking the location where the fixture will be installed, ensuring it’s centrally positioned for optimal lighting. When connecting wires, follow the manufacturer's instructions carefully; typically, you'll connect the black wire (hot) to the black fixture wire, the white wire (neutral) to the white fixture wire, and the green or bare wire (ground) to the grounding screw. Once the wiring is secure, mount the fixture to the ceiling, making sure it’s firmly attached. Finally, restore power and test the light to ensure everything is functioning correctly. Proper placement is crucial; avoid areas that are directly exposed to harsh weather conditions to maintain longevity.
Maintenance and Care
To keep your outdoor flush mount lights looking their best and functioning effectively, regular maintenance is key. Start by cleaning the fixtures every few months; a simple wipe down with a damp cloth can remove dust and debris that accumulate over time. Be sure to check for any signs of weather damage, especially after storms, as moisture can affect electrical connections. Regularly inspect the bulbs, replacing any that have burned out to ensure consistent lighting. If the fixtures are exposed to the elements, consider applying a protective sealant to help guard against rust and corrosion. By taking these simple steps, you can extend the life of your outdoor lighting and keep your space looking stunning for years to come.
Enhancing Outdoor Ambiance with Lighting
In summary, outdoor flush mount ceiling lights are a versatile and stylish addition to any outdoor space. They offer a perfect blend of aesthetics and functionality, illuminating areas for relaxation and socializing while enhancing the overall design of your home. Whether you’re looking to create a cozy nook on your porch or a vibrant gathering spot on your patio, flush mounts can elevate your outdoor experience. I encourage you to explore the various styles and installation options available to find the perfect fixtures that resonate with your vision. Illuminate your outdoor space today and enjoy the enchanting atmosphere that comes alive when the sun goes down!


Comments