
More from xiu umin


Related Blogs

Archives
Social Share
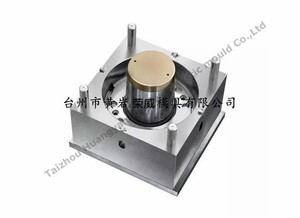
Specification for Installation and Adjustment of Pipe Fittings Mould
Body
1. Pre-inspection of mould:
Before loading the Pipe Fittings Mould with the injection moulding machine, the quality problem should be checked and found in time, and the mould can be removed after the mould is installed. When checking the fixed mould plate and the moving mould plate respectively, attention should be paid to direction marking to avoid mould clamping.
2. Oblique guide installation:
When installing the pipe fittings mould, the two should cooperate closely and safely. If there is a mould for the lateral separation mechanism, the slider should be installed in a horizontal position, i.e. the movable block can move left and right.
3. Mould fastening:
When the positioning ring of the pipe fittings mould is installed on the positioning ring seat of the injection moulding machine mould plate, the mould is closed at a very slow speed, so that the movable mould plate presses the mould lightly, and then the pressing plate and pad must be installed on the pressing plate. For this piece, the pressing plate must be loaded with 4 pieces up and down.
4. Correct catapult catapult distance:
After tightening the pipe fittings mould, slowly open the mould until the moving mould stops and recedes. This is to adjust the position of the ejector pin to a gap of not less than 5mm between the ejector plate on the mould and the bottom plate of the movable mould, so as to prevent the mould from damaging and ejecting parts.
5. Adjustment of tightness of closed mould:
In order to prevent overflow and ensure proper ventilation of the cavity, when adjusting the hydraulic plug-toggle clamping mechanism, it is mainly based on visual inspection and experience, i.e. it is not natural to toggle fast and slow when the mould is closed.
6. Cooling water can be connected:
After opening the cooling water, check if it is not blocked.
Household appliances mould is also one of our product, welcome to buy and purchase!


Comments