


Transform Your Workspace: The Ultimate Guide to Perfectly Wall-Mounting Your Computer Monitor!
In today's fast-paced world, creating an organized and ergonomic workspace has become essential for productivity. One of the most effective ways to achieve this is by wall mounting your computer monitor. Not only does this free up valuable desk space, but it also allows for better posture and viewing angles, reducing the risk of strain and discomfort during long working hours. The trend of wall-mounted monitors has gained immense popularity in both home offices and corporate environments, transforming the way we interact with technology. Whether you're looking to enhance your work setup or simply declutter your desk, this guide will provide you with everything you need to know about wall mounting a computer monitor.
Understanding the Basics of Wall Mounting
Wall mounting a monitor involves attaching it to a wall using a bracket, which can vary in style and functionality. There are three primary types of mounts: fixed, tilting, and full-motion. A fixed mount keeps your monitor in a stationary position, great for setups where you don’t need to change viewing angles. A tilting mount allows you to adjust the angle vertically, providing some flexibility for different seating positions. Lastly, a full-motion mount offers the most versatility, enabling you to swivel and extend the monitor, perfect for collaborative spaces or multi-purpose rooms. When choosing a mount, consider the weight and size of your monitor, as well as your specific needs for adjustability and positioning. It's also important to check the VESA compatibility of your monitor, which defines the mounting hole pattern on the back, ensuring a proper fit with your chosen mount.
Tools and Materials Needed
Before embarking on your wall mounting journey, gather the necessary tools and materials to ensure a smooth installation process. You'll need a power drill with drill bits, a screwdriver, a stud finder to locate wall studs, a level to ensure your monitor is perfectly aligned, and a wall mount kit that typically includes mounting brackets and screws. Having a measuring tape on hand will also help you accurately position the mount at the desired height. Additionally, consider using cable management solutions such as adhesive clips or sleeves to keep wires organized and out of sight once your monitor is mounted.
Step-by-Step Guide to Wall Mounting Your Monitor
Now that you have everything ready, it’s time to wall mount your monitor. Begin by finding the ideal location on the wall. Use the stud finder to locate the studs, as mounting on these will provide the necessary support for your monitor. Once you've identified the studs, mark their positions lightly with a pencil. Next, determine the desired height for your monitor, usually at eye level when seated, and mark this on the wall. After that, hold the wall mount bracket against the wall at the marked height, making sure it is level. Use the level to confirm that it is straight before marking the drill holes through the bracket’s mounting holes. Drill pilot holes at the marked locations, and if using a drywall anchor, insert them into the wall now. Secure the wall mount bracket to the wall using screws, ensuring it is tightly fastened and stable. Once the bracket is secure, carefully attach the mounting plate to the back of your monitor, following the instructions provided with your mount. With the help of a friend, lift the monitor and hook it onto the wall mount bracket. Make any final adjustments to ensure it is level, and then tighten any additional screws as needed. Finally, check the stability of the mount before moving on to cable management.
Safety Tips and Best Practices
Safety should always be a priority when wall mounting your monitor. Before drilling, ensure there are no electrical wires or plumbing behind the wall where you plan to mount the monitor. A stud finder can help you avoid these hazards. Always adhere to the weight limits specified by the wall mount manufacturer to prevent accidents. Additionally, make sure that the mount is secured properly; double-check all screws and bolts before placing the monitor on the mount. If you're unsure about your mounting skills, consider seeking help from a professional to ensure everything is installed safely and correctly.
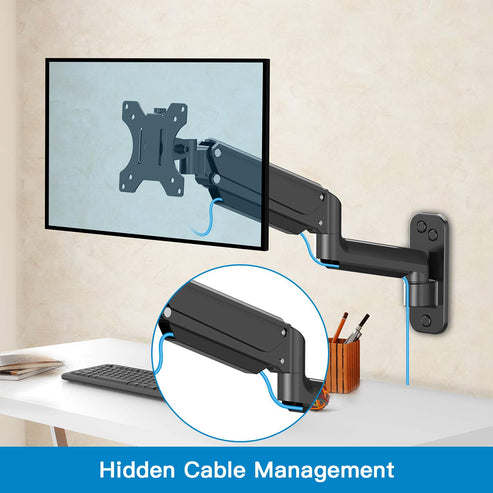
Final Adjustments and Cable Management
Once your monitor is securely mounted, it’s time to make those final adjustments. Ensure the monitor is at the correct height and angle for your comfort. You may want to step back and view it from your typical seating position to confirm it's positioned correctly. After that, focus on cable management to keep your workspace neat and tidy. Use adhesive clips or cable sleeves to organize and conceal the cables running from the monitor. This not only enhances the aesthetics of your workspace but also minimizes distractions and the risk of tripping over loose cables.
Enhancing Your Workspace with Wall Mounting
Wall mounting your computer monitor is a rewarding project that can significantly enhance your workspace's functionality and ergonomics. By choosing the right mount, gathering the necessary tools, and following a step-by-step installation process, you can create a clean, organized, and comfortable environment for work or gaming. Remember to prioritize safety and make adjustments for optimal viewing angles. With a little effort, you can transform your workspace into an efficient and stylish area that promotes productivity and well-being.


Comments