

More from Dijay jackson

Related Blogs

Les archives
Partage Social
Choosing the Right Electrical Box: A Homeowner’s Guide to Safe and Seamless Wiring
Corps
When I decided to tackle some DIY electrical work around the house, I quickly realized that the success of any wiring job depends heavily on one often-overlooked component—the electrical box. Whether you're installing a new ceiling fan, upgrading your outlets, or remodeling a room, the right electrical box can make all the difference between a safe, code-compliant setup and a costly, potentially hazardous mistake.
In this guide, I’ll walk you through everything I learned—from types and materials to sizing, mounting, and code considerations—so you can confidently choose the best option for your next home project.
Why Electrical Boxes Matter More Than You Think
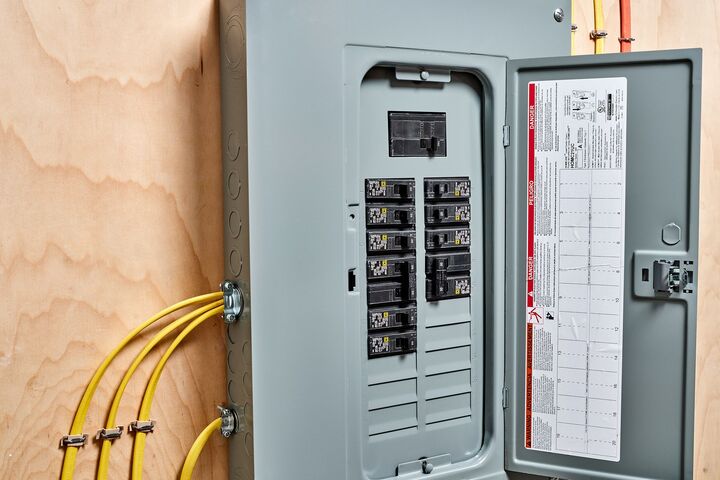
Electrical boxes serve as the backbone of your home's wiring infrastructure. They house and protect electrical connections, outlets, switches, and fixtures. Without them, your wires would be exposed to moisture, tampering, and wear—and that’s a recipe for disaster.
Beyond safety, electrical boxes provide structure. They ensure devices are mounted securely and evenly, creating a professional-looking finish. Plus, most local and national electrical codes mandate their use, so skipping them isn’t just unsafe—it’s illegal.
Common Types of Electrical Boxes and Their Uses
Choosing an electrical box starts with knowing the different types available. Each serves a specific function:
1. New Work Boxes
Designed for use in new construction before drywall goes up, these boxes are nailed or screwed directly into wall studs or ceiling joists. They offer the sturdiest mounting and are great when you have open framing.
2. Old Work (or Retrofit) Boxes
Perfect for renovations, old work boxes fit into existing drywall without needing to open up the wall entirely. They typically use mounting tabs or clamps to secure themselves in place.
3. Junction Boxes
Used purely to contain wire splices, these boxes don't support any devices. You’ll often find them in attics, basements, or utility spaces where wires need to connect or branch off.
4. Ceiling Fan/Fixture Boxes
Heavier-duty versions of standard boxes, these are specifically rated to support the weight and movement of ceiling fans and light fixtures. Never hang a fan from a regular box—it’s a serious safety risk.
5. Outdoor Boxes
Made from weatherproof materials, these boxes are used for exterior lighting, outlets, and other equipment. Look for ones with gasket-sealed covers to prevent moisture intrusion.
Choosing the Right Material: Plastic vs. Metal
Another major decision is whether to go with plastic or metal.
-
Plastic boxes are non-conductive, inexpensive, and easy to work with. They’re ideal for most residential applications.
-
Metal boxes are more durable and required in many commercial or industrial settings. They also help contain sparks in the event of an arc fault.
That said, you’ll need to ground a metal box properly, whereas plastic boxes don’t require grounding since they aren’t conductive.
Size Matters: How to Pick the Right Box Volume
You can’t just grab any box off the shelf. If your box is too small, you risk overheating wires or crowding connections. Electrical codes require a certain amount of space per wire, device, and clamp. Fortunately, many boxes are labeled with their volume in cubic inches.
Here’s a general breakdown of how space is counted:
-
Each insulated wire: 1 unit
-
Each device (e.g., switch or outlet): 2 units
-
Each internal clamp or grounding wire: 1 unit
Multiply the total unit count by the wire gauge volume requirement:
-
14-gauge: 2 cubic inches per unit
-
12-gauge: 2.25 cubic inches per unit
For example, if you’re installing a single switch with three 14-gauge wires, you’d need at least an 8 cubic inch box:
(3 wires + 2 for the switch + 1 ground = 6 units × 2 cu. in. = 12 cu. in.)
Mounting Tips for Success
Installing an electrical box isn’t difficult, but it does require attention to detail.
-
Ensure boxes are mounted flush with the finished wall surface.
-
Use a level to keep devices aligned—crooked outlets are surprisingly noticeable.
-
Don’t overfill the box. If in doubt, go up a size.
-
When using old work boxes, make sure the drywall is sturdy enough to support them.
-
For ceiling boxes, confirm the box is rated for the weight of your fixture or fan.
Electrical Codes and Safety Considerations
Local electrical codes (usually based on the National Electrical Code, or NEC) govern almost every aspect of installation—from box type and placement to grounding and accessibility.
Some key rules:
-
All wire splices must be contained within an accessible box.
-
Boxes must be covered with an appropriate cover plate.
-
Boxes installed outdoors must be weatherproof.
-
You must leave at least 6 inches of free conductor inside each box.
If you’re not sure about code requirements, it’s always a good idea to check with your local building department or hire a licensed electrician.
When to Use a Professional
While installing an electrical box can be a DIY-friendly task, there are situations where you should call in a pro:
-
If your project involves high voltage or complex wiring
-
If you're unsure about grounding or box sizing
-
If your work will be inspected for permit approval
Hiring a professional not only ensures safety but could save you from costly rework or fines.
Final Thoughts
After installing a few new outlets and replacing a light fixture, I can confidently say that understanding how to choose and install the right electrical box made the process smoother and safer. It’s a detail that many people overlook, but it plays a huge role in the long-term functionality of your home’s electrical system.


commentaires